
The hardest fights in The Surge 2 are found with bosses, all standing in your way of the eventual truth that haunts Jericho City. For this guide, we’re taking a look at a returning foe, now more powerful than ever before: the resurrected Brother Eli. This boss fight reuses a fair bit from your first encounter with Brother Eli, with some additional difficulties added through expanded move sets and a new gimmick. This fight with Eli can make or break some playthroughs, but it’s also one of the most satisfying to beat, as it requires you to pull out everything you’ve learned so far in order to come out on top.
Location and preface
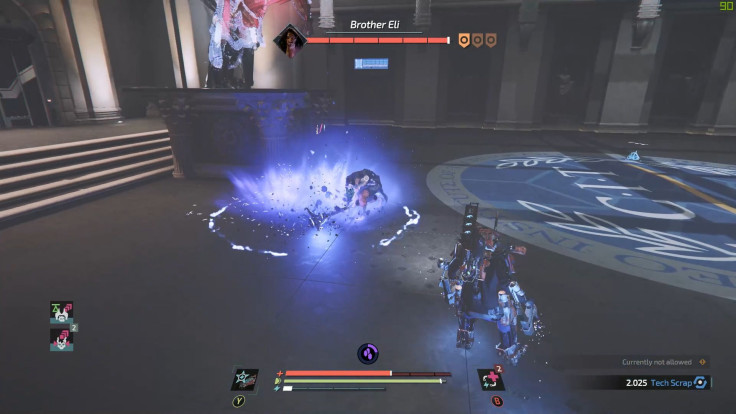
The resurrected Brother Eli will be waiting for you in the lobby of the CREO Institute of Technology. After dealing with the many horrors of the Underground, as well as possibly meeting with a second iteration of the Delver, you find yourself in a side entrance to the CIT to meet up once again with Jonah Guttenberg and discuss Athena’s merging with the nanite cloud. Unfortunately, Eli also heads here, intent on stealing the knowledge needed to merge with the nanites for himself. You will need to kill him once again here and now, hopefully for the last time (spoilers: it’s not).
This fight with Eli relies on the same fundamentals as his first one: deflect as much as possible, and create openings for yourself rather than waiting for him to create them. Like his first fight, you want to have your Starfish equipped here in order to create small pauses from his relentless attacks, as well as open up opportunities for your own. Directional blocking is more important here than in any other boss you’ve faced thus far, as almost all of Eli's attacks can be deflected for huge openings. Once you memorize the timings and get everything down to a perfect T, the fight will become a trivial, yet memorable encounter.
Preparation
You’ll know if the fight’s coming up once you find yourself in the left wing of the CIT. As you look down on the lobby, you’ll find Eli trying to make his way towards the main elevators, which is the only path towards Jonah Guttenberg. He’s accompanied by two Children of the Spark acolytes, much like the first fight. The only difference this time around is that they’re already spawned in, rather than them spawning during certain phases.
Your trip to the underground will yield some new weapons and armor, and for the latter the most notable is the LYNX set, which is also one of the most useful in the game. You can craft this beforehand to use in the fight against Eli, and the great thing about this set is that its most useful bonus comes from three pieces rather than six. You can take advantage of this to add three more pieces for another partial bonus. Check out the bonuses for the LYNX set below.
- Three-piece bonus – reduces the stamina cost of performing evasive moves. Very clutch bonus to have if you’re having trouble deflecting, since this gives you more wiggle room in evading Eli’s enhanced attacks and move set.
- Six-piece bonus – killing enemies increases Attack Speed for a moderate duration, with subsequent kills stacking this effect multiple times. Not as useful for this fight, since the bonus can run out before it becomes substantial, but if you have nothing else better to put here it may be worth getting the entire set.
The LYNX set comes from the zombiefied workers underground, characterized by their electricity-enhanced single-rigged weapons. They’re not very hard to kill, but their weapons carry significant impact due to their sheer power, so be careful.
If you’re thinking of another three-piece bonus to use with the LYNX bonus, here are some great options to choose from, all available to get before the Eli fight.
- AID Eclipse Set – found from the AID enemies in AID Command. While the six-piece bonus is a bit harder to maintain, the three-piece bonus is great if you’re wielding the Overseer hammer; this set’s partial bonus increases the impact on any hammer weapon. This gives you a better chance of staggering Eli before he can even pull off his combos so long as you’re wielding a hammer.
- Nano Ward Set – found in chests scattered in AID Command. The full set bonus produces a nanite explosion every time you successfully deflect an attack, but the three-piece is pretty useful, too. Wearing the armor partially reduces the stamina cost of blocking attacks, coming in particularly handy in this fight due to Eli’s nature.
- Liquidator Set – found on enemies outside the Babylon Gardens, wearing the full set grants you +200 elemental defenses, which is extremely useful for Eli. His attacks now deal nano damage, and as such getting elemental defenses is a good fallback for beginners. The three-piece bonus is not too shabby either, as it gives you damage reduction on both poison and nano effects.
- Chrysalis Set – found on the nanite-enhanced enemies throughout the game. Nanite-enhanced enemies start to spawn after your fight with Shields, and there are a number of them before your fight with Eli. The full set bonus is pretty good all around, as killing enemies increases your damage for a moderate duration (stackable). The partial set bonus is helpful if you’ve already got a nanite weapon ready, as it increases your nano damage by +20.
For weapons, electrical, nanite or fire-based weapons could work, given that he’s still human even after going through a resurrection. Any impact-heavy weapon, such as the AID Type-11 Overseer (found on the lone Cerberus Soldier in the Liang Li Hospital at AID Command) also works wonders, given that you can properly deflect attacks for huge and devastating openings. At the very least, choose a weapon you’re most comfortable with. Eli’s fight allows for some flexibility when it comes to what you wield, and you can technically win with any weapon you use so long as you can properly time and deflect his attacks.
A revamped move set
For the most part, Brother Eli will be using the same moves as in the first fight, with a few additions here and there to keep you on your toes. You can check out my first Brother Eli boss fight guide here for a detailed list of his move set, as what is listed below are the additions he made for this rematch.
The first order of business before you even begin to fight him is to deal with the two acolytes, as they can be quite annoying due to their Blue Sparkle-induced rage. They both drop battery charges as well, which you can leave around for emergencies once you run out of injectables. With the proper weapon, one counter deflection is enough to kill them. That said, do not go for a finisher to save up on battery charges.
The first big change you’ll notice with Eli is that he now has the ability to teleport short distances. He’ll always rely on this to close the gap between you and him, and as such keeping away from him won’t do much. These blinks can work to your advantage, however. If you’re quick enough, you can punish his opening attack immediately by blocking it.
Eli has also added nanite-powered shockwaves to some of his attacks, all of which will send you either flying or staggering to the ground. These attacks are at the very tail end of his regular combos, and as such they are very easy to anticipate. Most of them can be blocked, but remember to be in range; it’s easy to miss the proper distance between you and Eli, especially since his weapon throws out ranged attacks from time to time in the form of these shockwaves. While you can check back on the moves that he used in your first encounter and apply the timings for this fight here, he has one new attack to watch out for:
- Charged right slash to unblockable thrust – Eli will raise his weapon to charge a powerful swing which will come from the right. There’s a slight delay before the attack reaches you, so keep note of the timing. Afterwards, he will pull his weapon back, following it up with a long-reaching thrust that extends far beyond the length of his hammer. This attack is unblockable, and it’s best to try and dodge to the side once he throws it.
The lobby of the CIT is pretty big as far as boss areas go, and as such you can take advantage of this. There’s a statue near the stairs that provides good cover for when you need to heal up, or take a short breather. More importantly, always keep Eli in the middle of the room, as some of his attacks are very wide in terms of hitboxes – you do not want to get caught in a corner defenseless.
In between the fight, use the Starfish to temporarily stop his advance and create more openings for yourself. Eli is susceptible to being shocked, but the duration on the stun is far shorter than when you first faced him. Once you’ve gotten him low enough, you can go for a finisher to finally end this rematch once and for all.
Other helpful tips to remember
- Like the first Eli fight, try and stay in place whenever he does his flurry of attacks. While these may seem more intimidating this time around, all of them can be blocked with properly timed deflections, and staying in place helps you time blocks better compared to constantly moving around the area.
- His attacks deal significantly more damage now, thanks to the nano shockwaves. The horizontal ones can hit you from across the room, and you want to always dodge to the side rather than backwards if it homes in on you.
- Always go for the acolyte from the far side of the room rather than that near Eli, so as to avoid getting swarmed by the three of them.
Aftermath
After beating Eli decisively for a second time, you will get a mysterious armor part for the Dark Prophecy set, depending on where you performed a finisher. It’s also a form of foreshadowing for what will be your final showdown, which will come later in the game.
You can now head back to Jonah Guttenberg, who will ask you to put a stop to the Children of the Spark’s actions. With their sinister plans slowly being unveiled, Guttenberg directs you to their Cathedral in Port Nixon, deep within the belly of the beast and up against some of the most challenging enemies in the game. At its center is the Spark, an all-powerful energy source which holds the key to ending this ordeal or destroying Jericho City and the world altogether.
Stay tuned for more guides on The Surge 2. The game is now available for PC, PlayStation 4 and Xbox One. Check out my review for The Surge 2 here. You can also check out other The Surge 2 guides below:
- Beginner’s Guide
- Warden Garcia Boss Guide
- Best Starting Weapons and Armor
- URBN Gear Set and URBN Judgement Axe Location
- Little Johnny Boss Guide
- Brother Eli Boss Guide
- Lost Seed Locations In Gideon's Park
- Captain Cervantes Boss Guide
- Delver Boss Guide
- Exceptional combat mechanics.
- Well-implemented RPG system.
- Interesting level design, dense and filled with secrets and hidden routes.
- Good difficulty curve, extremely tough at times but completely fair.
- Improved storyline, with much more interesting characters.
- Fair bit of replay value.
- Great art, enemy and world design.
- Forgettable music.
- Some technical issues like animation jank and visual bugs.
- Constant backtracking may prove to be tedious to some people.


