
The hardest fights in The Surge 2 are found in its bosses, all standing in your way of the eventual truth that haunts Jericho City. For this guide, we’re taking a look at Brother Eli, a sinister figure who finally shows his true colors. Brother Eli is also the hardest of the early-game bosses due to how agile he is with his attacks, as well as his penchant for calling upon reinforcements during specific points in the fight.
Location and preface
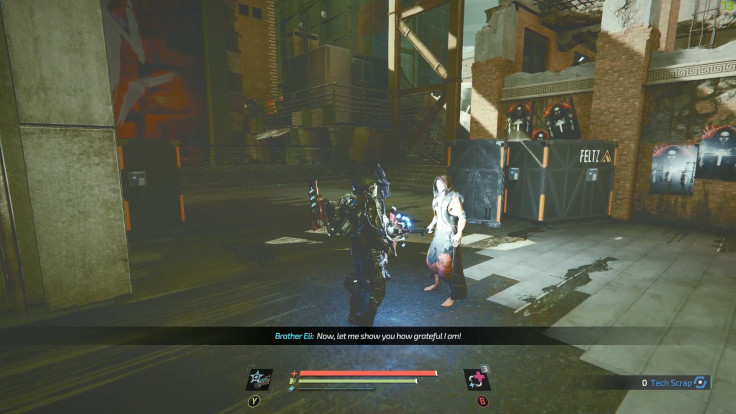
Brother Eli will meet you in the very first area of Port Nixon after you’ve defeated Little Johnny. This can come as quite the shock for some players, as you now need to defeat Brother Eli in order to leave Port Nixon. When you meet him, he reveals that you became an unwitting pawn in his plans to further himself in the Children of the Spark; by removing the favored son of Matriarch Celeste – who happens to be Little Johnny – Eli gains more power and favor within the cult, turning into a hero in everyone’s eyes as he avenges Johnny by killing his murderer.
Brother Eli is the first true test of skill in The Surge 2. Not only are his attacks fast and powerful, he also has a number of followers at his disposal to help him defeat you. He summons them at several phases into the fight, which could prove to be very distracting. All of this said, if you managed to keep up with his ferocity through precision directional blocking and effectively keeping him at bay with cross combos of your own, you’re ready to take on the harder challenges that await you in the next big areas of the game.
Preparation
The path to Brother Eli is relatively straightforward; from the Med-Bay in Port Nixon, backtrack until you reach the first area leading back to Seaside Court. Eli will talk to you for a moment, during which he reveals his plans to you like some sort of supervillain. Afterwards, the fight immediately starts, so there’s no real way to prepare ahead unless you read guides before even knowing that he’s a boss.
If you die the first time, it’s to be expected, and as such you want to take this short break to prepare yourself. When it comes to weapons, both of your nanite-infused weapons should work nicely (Metamorphing Talons and Vibrating Quickscythe). Impact-heavy weapons are also amazing against him, since his whole body is unarmored; he makes up for this fact by being relentless in his assault, and with the game’s rather aggressive tracking, be prepared for a world of hurt.
Fortunately, you’re now well-equipped to deal with him, as you can use the EMP-44 Starfish attachment on your drone to halt him in his tracks. Using the drone is very helpful in this fight, as if it doesn’t outright stun him, it will stagger him briefly, giving you enough time for a quick wallop or to just dodge out of the way of his next flurry of attacks. The Starfish also has a relatively quick cooldown, allowing you to use it liberally.
Make sure to have all your injectables filled, and your weapons in their respective slots. The VULTR set works very good here as you can use the set’s six-piece bonus to dismember all of the summoned cult members while still keeping yourself relatively healthy through injectable charges.
Directional blocking is key
I hope you’ve brushed up on your directional blocking skills, as the fight with Brother Eli is made incredibly easier once you’ve got the timing down on all blockable attacks. Here is a list of them:
- Slide into right swing, followed by attack from under – this is his favorite attack to do if you’re far from him. There’s a slight delay on the slide attack itself which will always land on your right; as he stands up, he charges an attack from under. Both can be directionally blocked.
- Attack from under, followed by jumping overhead – a good attack flurry to try and learn to block, as both are relatively easy to time. Eli will charge a wallop from underneath, then spin jump into the air for an overhead attack.
- Four-swing side attacks – one of the harder attacks to time, in particular because you have to constantly block in order to stop its flurry. It will start from the left, then the right, and then Eli will do a quick spin to deliver to quick attacks from the left. All are blockable, but rather challenging to time. Eli also has a variant of this, in which he starts from the right, but both are basically the same in principle.
- Rush into delayed spin attack – this one can be a bit confusing, as Eli fakes a bit before actually throwing the attacks. He first charges into you from a distance, with his weapon coming from underneath. Afterwards, he will spin twice to deliver an attack. The attack here will come after the second spin and from the left, meaning that if you missed the block on the underneath attack, you can try and dodge the second one instead.
- Three overhead attacks – another good attack flurry to practice your blocking on, as it’s also easy to time. Eli will first swing two consecutive overhead attacks, both with the same timing; the last attack will see him go two steps forward to deliver a mighty blow using both his hands. All attacks can be directionally blocked from overhead.
Brother Eli’s greatest strength is also his weakness. Iif you manage to get the timing down on most of these attacks to block them, the fight becomes incredibly trivial. Dodging could work, too, but the fight itself becomes rather tedious as Eli gives very few openings in between his attacks.
Summoning cult members at his side
Once you get him down to three bars and one bar of health, respectively, Eli will summon one Twin-rigged-equipped cult member. Once they spawn, you should try to kill them as fast as possible, as it’s entirely plausible to have two cult members there simultaneously, crowding the balcony you’re fighting on. This gives Eli much more room to make his attacks. Fortunately, they’re also a lot weaker than their regular counterparts, and if you can burst them down quick enough, they should no longer pose a serious threat.
It’s important to note that once you lock into these minions, Brother Eli will start to build a turret to further distract you. Try and take the fight close to him so you can hopefully burst the turret down before it does any major damage.
Other helpful tips to remember
- Try not to move too much while fighting Brother Eli. Instead, wait for him to start his flurry before deciding on whether you will dodge or block; this ensures that you always have ample room to move in and avoid getting boxed into a corner.
- Brother Eli uses a Hammer, which means that most of his attacks will stagger you. If you partially blocked an attack (denoted in yellow), it will still most likely stagger you, but it will not stop you from trying to block the next attack, if there’s any. Keep your cool in these situations and try to focus on the next block rather than worrying about the missed one.
- Dodge and hit tactics can work, but you have to constantly watch your stamina. Eli’s attacks are incredibly aggressive when it comes to tracking, which can pose a problem if you don’t time your dodges right.
- Once you killed the minions, they will drop a battery, which can be helpful in replenishing your injectables.
Aftermath
Hopefully, using the tactics in this guide you can manage to bring Eli down. Afterwards, you will be rewarded with his own weapon, the Warhammer of Forced Conversion. It’s a relatively powerful Hammer with some good stats on it, in particular the impact. Unfortunately it does not carry any elemental damage.
You will also be privy to Athena’s third vision, which documents her escape from the AID who was supposed to rescue her. At the last minute, they’re stopped in their tracks by cult members, and her current whereabouts are now unknown. After the vision, you get a new chest, which rewards you with the Decharge Regenerator implant. This implant gives you health regeneration as your energy bar drains.
From here on out, you can continue back to Seaside Court, where news of Eli and Johnny’s death has spread far and wide. AID is also after you by now, as the connection between you and Athena is starting to unravel. Before you leave Seaside Court you’re confronted by Jordan Black and her band of Hunters, as they try to dissuade you from an ongoing monster hunt happening at Gideon’s Rock. This is where the next leg of your journey begins, and it only gets harder from here on out.
Stay tuned for more guides on The Surge 2. The game is now available for PC, PlayStation 4 and Xbox One. Check out my review for The Surge 2 here. You can also check out other The Surge 2 guides below:
- Exceptional combat mechanics.
- Well-implemented RPG system.
- Interesting level design, dense and filled with secrets and hidden routes.
- Good difficulty curve, extremely tough at times but completely fair.
- Improved storyline, with much more interesting characters.
- Fair bit of replay value.
- Great art, enemy and world design.
- Forgettable music.
- Some technical issues like animation jank and visual bugs.
- Constant backtracking may prove to be tedious to some people.


