The Surge 2, in the same vein as other Souls-likes, is a very challenging title. While the game spares no expense in making you look and feel as badass as possible, pulling off all those sweet action-packed moments comes at the price of high difficulty. With volatile enemies everywhere and an unforgiving landscape where there is certainly an ambush around every corner, The Surge 2 can be a very tough nut to crack, especially if you’re going about its mechanics the wrong way.
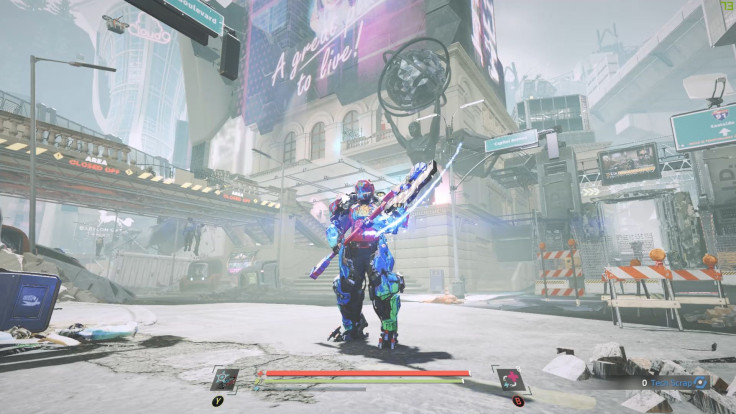
For this guide, we’re taking a look at where players can find the URBN Gear Set, a pre-order DLC for The Surge 2. The URBN Gear Set consists of the URBN Goliath armor, a heavy, yet extremely powerful set that relies heavily on your battery output and consumption. It comes with the URBN Judgement Axe, a Heavy-Duty weapon with amazingly high attack speed and decent Electricity output.
The URBN Gear Set drops from URBN Enforcer enemies, of which there are several scattered throughout Jericho City. I strongly recommend finishing Port Nixon first before trying to obtain this set, as it requires you to pass through heavily-armed places filled with difficult enemies.
URBN Gear Set and Judgement Axe
The URBN Gear Set is immediately noticeable by its bright spray-painted colors, and they are basically variants of another powerful Goliath set, the MG Cerberus. That said, the URBN Gear Set requires lower core consumption than the MG Cerberus, but it’s still high enough that you may need to sacrifice some implants in order to get its full-set potential.
As for stats, the URBN Gear Set boasts high stability, high elemental protection, less stamina cost for running and high impact at the cost of lowered attack speed and higher stamina cost for evasion. It also provides a bonus for damaging armored parts, while lessening your damage with unarmored ones. As for the partial and full set bonuses, check it them below.
- Three-piece bonus – increases defense while three or more batteries are filled, with significantly more increase with five or more batteries.
- Six-piece bonus – increases damage while three or more batteries are filled, with significantly more increase with five or more batteries.
At higher core power levels and with the right implants, this makes the URBN Gear Set a terror for your enemies. To use it effectively, I suggest going with a 2:1:1 ratio for every two core levels, with two points going to stamina, and one point each for battery and health. This should give you the stamina necessary to maintain its stability when blocking as well as the occasional dodge.
As for the Judgement Axe, it’s a prime Heavy-Duty weapon due to its relatively fast swings and Electrical damage. Using cross combos with this axe will constantly apply the Electricity tic, which is why it’s a great weapon to use even if you’re not aiming for the URBN Gear Set itself.
URBN Gear Set and URBN Judgement Axe Location
The URBN Gear Set and Judgement Axe are dropped by all URBN-wearing enemies, and as such it doesn’t matter which of them you kill. They also respawn constantly, so there’s no danger of you missing out on a piece. All of the URBN enemies are found in the streets of Jericho City, and finding them is relatively easy – it’s the killing them that will be the hard part.
For this guide, I’ll only be noting one location for URBN enemies. You can reach it very easily if you’ve already finished the Port Nixon area, and the routes leading to it unlocks a shortcut to the Med-Bay area, making farming very easy.
Welders Block Rooftops – this area has one URBN wearing enemy, and it connects to the upper levels of the Seaside Court. From the very first Med-Bay, head towards Riverside Street and make a left. Continue towards the intersection leading to Seaside Court and make another left, this time heading to the AID Scanner and checkpoint.
Getting inside the checkpoint
From here, you have two options: you can deal with the AID guards at the front gate, which is messier, but a lot shorter. That said, there are three of them – two at the entrance, and one inside the checkpoint. You can try drawing each of them out one by one, but take care as those far from you will most likely use their rifles to retaliate from a distance.
The other route is through a side street that you can take by going left, where you will see a building with a gaping hole in it. If you check out the building on the right, you can talk to a Shady Doctor who will give you a quest to recover a drone of his that was shot down. You might as well take the quest right now, as you will be headed to the same area anyway.
Once you enter the building through the huge hole, you will be met with an enemy wielding a car door as a shield. If this is the first time you’ve encountered one of these enemies, know that you can easily defeat them by charging an attack towards their arm; this breaks the shield and lets you deal with them properly. You will also face one other gun-wielding enemy atop another level, so be careful.
Once you’ve dealt with them, continue upwards. You should see a yellow forklift here, with some breakable boxes near it. Break the boxes to uncover a secret passage. You will then find yourself outside on a side street, where on the other side of a scaffold one of the URBN Gear enemies awaits. You can’t reach them through here though, but there is some loot on the far side of the street worth checking out.
Go back inside from where you came and continue going upwards. At the peak of the last staircase heading left, there is an unarmored enemy with a spear. Kill him, and you should then find yourself on a catwalk leading to two paths.
Take the rightmost path first, the one leading to a magnetic lift. Take it down, and you should find yourself in an alley. At the far end of the alley is a door that leads back to the Med-Bay at the JCPD back alley You’ve now unlocked a shortcut towards that area. After unlocking it, go back up the magnetic lift and take the other route through the catwalk.
You’ll then find yourself in a room with a collapsed roof. On the far side of it are two enemies. One is an unarmored one that throws rocks and the other a shielded one again. Eliminate them both and look out the big opening to see that you’re now on top of the checkpoint.
From here, you can drop down to the container van. Before you drop to the ground entirely, look towards the AID tents to find a scanner bot. These are somewhat dangerous because of their Electricity damage, but if you’re careful enough you can drop down near it without drawing the attention of the other AID guard inside the checkpoint. The latter usually stays in the well-lit side near the scanner gate, while this scanner bot can be found in a darkened corner, separated by the container van.
After eliminating the scanner bot, you can now try and deal with the AID guard inside the checkpoint. Try and draw his attention away from the gate and towards where you fought the scanner bot, so as not to attract the attention of the guards outside. If done correctly, you only need to fight one AID guard instead of three, and this makes the ordeal a lot easier, if a bit longer due to the side route you took.
Heading towards the Central Plaza
Whatever path you ended up choosing, both will ultimately converge inside the AID checkpoint. From here, take the magnetic lift. Then, take the stairs to your right to find yourself on the balcony overlooking a small courtyard. Check the far corner of the balcony for some loot left by the Stranger.
Afterwards, you can now ride the magnetic lift down. From here, you can make a left to unlock a door leading back to the AID checkpoint, giving you a shortcut. On your right, you will see rubble that has the quest item for the Shady Doctor. Pick it up, and head towards the wall. On the rightmost side, hidden from view, is a path towards the Welders Block Rooftops. Head straight in and look to your left to find another chest. Then, go straight and make a right to find your first URBN enemy.
Beating the URBN enemy
The URBN enemy can be very difficult if this is your first time meeting him, so exercise caution. He’s surprisingly fast and agile, and the axe attacks deal a ton of damage with each swing. If you’re having trouble, consider utilizing your drone more along with a longer reaching weapon to avoid his swings entirely.
Heading to the nearest Med-Bay
Once you’ve done a finisher on a limb, you can now head towards a shortcut to the nearest Med-Bay. Climb up the stairs towards the rooftop to find two diverging paths: one leading to a door and the other to a magnetic lift. Take the right one first, leading to a door you can open to unlock a shortcut leading towards the alley near Seaside Court. If you look to your left, you’ll also find a tent, and on the catwalk is an AID soldier who camps there to shoot you if you head back to Seaside Court’s upper level. Kill him, and he will no longer respawn.
Afterwards, you can now activate the magnetic lift to head down. The path branches off again in two ways: the right route will take you back to the intersection before the AID checkpoint, unlocking a shortcut along the way. You will want to take the left route instead, leading to a catwalk next to a long tube. This acts as a bridge back to Seaside Court, and once you’ve crossed it, you’ll find yourself in the upper entrance.
You can now use this very short catwalk and magnetic lift route to farm the URBN enemy for his gear. It’s relatively faster and easier, as there’s only one URBN enemy to eliminate. The two other spots have many enemies nearby, making farming a whole lot harder.
Stay tuned for more guides on The Surge 2. The game is now available for PC, PlayStation 4 and Xbox One. Check out my review for The Surge 2 here. You can also check out other guides below:
- Exceptional combat mechanics.
- Well-implemented RPG system.
- Interesting level design, dense and filled with secrets and hidden routes.
- Good difficulty curve, extremely tough at times but completely fair.
- Improved storyline, with much more interesting characters.
- Fair bit of replay value.
- Great art, enemy and world design.
- Forgettable music.
- Some technical issues like animation jank and visual bugs.
- Constant backtracking may prove to be tedious to some people.


