
The hardest fights in The Surge 2 are found with bosses, all standing in your way of the eventual truth that haunts Jericho City. For this guide, we’re taking a look at my favorite boss in the game, the Delver. A nanite monstrosity that’s fully capable of tearing you apart through his nanite-based attacks, the Delver is a very tough boss as it has three different phases you must contend with, each with its own move sets, timings and strategies to apply. Beating this one is a graduation of sorts, as you will need to utilize everything you’ve learned thus far in order to finish it off and find out what happened to Athena.
Location and preface
The Delver is the second boss of Gideon’s Rock, only accessible after you’ve activated the three repellers to drive the creature back into an underground cave trap. The Delver first starts off as an unwitting ally, freeing you from the JCPD Detention Facility. Afterwards, it heads to Gideon’s Rock, where a reclusive tech conglomerate offers a hefty reward for its nanite brain. This leads the city’s prestigious Hunters to go after it, with much bloodshed and betrayal happening behind the scenes, culminating in your meeting with Cervantes. Killing the Delver will gain you an audience behind one of the central figures in Jericho City, who may hold the knowledge of Athena’s whereabouts and information about the state of the city.
What will ultimately frustrate players with the Delver is its obnoxiously large health pool, broken down into three phases. That said, he also offers a good variety of attacks, all there to test you on what you’ve learned so far and how you’re able to handle pressure. It’s not going to be easy, but if you can manage to pin down his timings, know when to evade, and capitalize on his lumbering attacks, you’ll soon find yourself victorious over what is easily one of the best boss fights in The Surge 2.
Preparation
The gap between the Captain Cervantes boss fight and the Delver depends on the order in which you activated the three repellers. If you saved the Boar Wilds Trailhead for last, then you will fight the Delver immediately after Cervantes. It’s up to you how you want to space them apart, as you can activate the repellers in any order you wish. You can also catch up on Kill Switch, one of the friendly Hunters in the Overlook, as to the Delver’s current location. Following that, you can try and track where he’s heading next to activate the repeller in that order.
The Jaguar armor works wonders for this boss, as using drone shots in tandem with your regular attacks will give you a swift edge in whittling down his health. You can try crafting the set before the fight, as there are lots of chances to farm them from the Hunters lurking in Gideon’s Rock. That said, any armor set will do, although you’re going to want to minimize your stamina consumption at all costs.
As for weapons, any solid and fast-hitting weapon is best. While the Delver does nanite damage, he can still be afflicted with nanite explosions, so you can use any of Athena’s gift weapons against him. Spears, Staffs, Twin-rigs, and One-handed weapons are all viable options, as you’ll want to constantly keep your energy build-up fast for your injectables, as well as good one-two combos before countering his attacks.
One standout I would like to mention is the GAIA Lancer, which deals solid base damage and boasts a relatively high impact for a Spear. You can also poke him quickly using other Spears, setting up some possible deflections afterward for a potential stagger, making it the best weapon category for this fight.
For drone attachments, the AID ‘Empire’ Sniper Rifle is the best due to its single target burst. With this, you can easily whittle down his limbs during the second and third phases of the fight. The Starfish does little to stun the Delver, as well as electrical damage in general, so hold off on using those and instead opt for either nanite or non-elemental weapons.
Once he’s trapped in the hole, the area around it will be filled with the smaller crab nanite creatures. You can kill them easily to gain charges on your battery for injectables.
First Phase
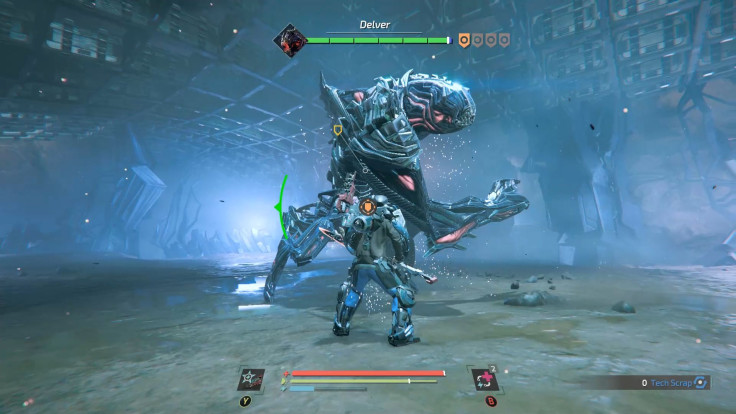
After you jump in the hole, ready yourself. His first attack is unblockable and has decent tracking on it. He will always come from the far side of the room, and you can see where by looking at the ground, as he comes from below it. Dodge at the last second and immediately lock onto either of his arms.
His health will be green here, and you’ll need to drop that green to blue in order to reach the next phase. The reasoning for focusing on his arms is to make it easier to track them for a proper deflection. All of his attacks in the first phase are side swipes, with three flurry variations:
- Right swipe, backhand from left, left swipe (R-L-L) – this is the Delver’s most common attack pattern, with him starting with a swipe from the right, followed by a backhand from the left using the same arm, and ending with a delayed swipe from the left. The timing for this attack is the easiest to get, since there’s a big wind-up before each one hits.
- Left swipe, right swipe (L-R) – two fast swipes coming from both directions. This one is almost instantaneous, making it harder to telegraph; if you miss the first one, do not panic and try to time the second one instead.
- Right swipe, left swipe, right swipe (R-L-R) – three-hit attack that’s also instantaneous. However, there’s a pause between the second and third swipe, so if you miss the first two, you can catch up on the third.
Besides the constant swiping, Delver also has a burrowing attack. He will first burrow underground, appearing at your location after a short while. You can tell when he’s about to surface as the soil beneath your feet starts to shake – this is the moment to dodge. After surfacing, he will swipe in front of him. You can try and attack him after the swipe is done, but usually he’ll be underground again before you get near him. The Delver will do this twice, and for the third one, he will jump into the air to land on you. To avoid it, move as far away as possible from where he will appear, sprinting along the way. If you time it right he should just miss you, and afterwards you can keep the pressure on once more.
Once his green health goes down to nil, he will start to glow blue, which ends in a small explosion. This signifies the start of the second phase.
Second Phase
Relock to either of his arms for this phase, and you’ll notice that they have health bars now. The Delver is more agile in this phase of the fight, often utilizing fast moves to reposition himself to flank you and damage you. That said, his health pool here is also a bit weaker and more susceptible to damage, so always look for proper openings. While in this phase, he also has two forms: one on the ground, where he deals most of his damage, and one on the ceiling as a mass of nanites, throwing projectiles and covering more range.
While on the ground, he only has two forms of his swipes: swipe once from either side, or swipe twice from both sides respectively. He will usually circle first before swiping, so once he does, always keep your block ready.
That said, he can now also deliver two special attacks: a face thrust, in which he elongates his neck, and a spin attack which is unblockable. The face thrust can be blocked with a regular block, but not directionally. You can tell when he’s about to do a face thrust when he stops moving and raises his arms; immediately afterwards, he will elongate his neck to deliver a blow. You can also dodge this attack, but make sure to dodge sideways rather than back, as it can track quite well.
The unblockable spin attack is denoted by the marker from your directional block implant. If you’re not using it, you can tell when he will do this once he hunches over and stops briefly. Dodge backwards to avoid the attack entirely.
His second form begins once he stands up and nanites start to appear; this is your cue to dodge back as far as you can. His current form will then explode and fly to the ceiling. While here, he will throw nanite projectiles which deal damage and can block your movement. Avoid it by moving sideways, but always stay towards the middle of the room in order to keep the projectiles there. After throwing projectiles twice, he will then crash back to the ground at your location, so move away before he lands on top of you. However, make sure that you’re as far away from the projectiles as possible, as he will call those back to him, dealing damage if they hit you.
While he’s on the ground for his second phase, try and keep close to him. If you start to drift away, he will rush you with a direct unblockable attack that’s painfully hard to time with a dodge as it circles back to his original position.
Once you deplete his blue health bar, he will glow blue once again, resulting in final explosion that will knock you over. This is the third and final phase.
Final phase
In this form, the Delver now stands upright, and his arms have transformed into two monstrous weapons: the right a hammer, and the left a claw. Both have health bars, and you can destroy them – for a brief period, that is. After destroying them, he will charge for a moment to heal it back up, making these arms a constant source of problems for you.
However, you still want to focus all of that damage on the arms due to the fact that all damage he does while they are weapons are amplified, leaving a trail of nanite clouds in their wake. Once you destroy each, they will start dealing nanite damage, making the fight so much easier. Always go for the arms during this phase.
Unlike the first two phases, you should try and dodge all attacks rather than block them. The reason for this is that these attacks deal so much nanite, impact and raw damage – two missed blocks and you’ll most likely explode from the nanite buildup. Unless you can get down the timing of the seriously delayed attacks, stick to his sides and deliver blows on both of his arms.
Besides the deadly swipes, the Delver also has two special attacks in his final phase. The first sees him leaping up into the air to deliver a surging shockwave in a straight line. This can be easily avoided by going to either of his sides once he’s up in the air.
The second is so much deadlier, and can one-hit you if you’ve already got nanite buildup. The Delver will turn his body and slide fast towards you. It’s incredibly hard to time a proper dodge for this, and as such you want to be as far away from him as possible once he starts doing it. It has a pretty big wind-up in which he stands still, so there’s some time to move towards either side and make a break for it before he starts to slide.
Continue to keep up the pace, focusing on his arms to deal the most damage until he finally explodes one last time, this time fully dead.
Other helpful tips to remember
- What will ultimately break you here is the sheer length of it. For the first few tries, it’s absolutely disheartening to die during the second or third phase and have to do it all over again. If you find your resolve wavering, take a short break and clear your head, maybe even put down the game for a while until you’re ready to go again.
- Most of the boss fight here is you reacting to what moves Delver is throwing, and as such you want to be as cautious as possible. The only real openings are when he gets staggered by directional blocks, with everything else only a time for one or two hits. Don’t get too greedy as well, as the Delver can deal a surprisingly large amount of damage in just one or two swipes.
- Don’t give up! You’ve made it this far, and there’s still so much left to experience, all worth going the distance for.
Aftermath
Beating the Delver will reward you with the Helix of the Delver, a powerful nanite staff. You will also get the Nano brain, a quest item that you can now turn in to the mysterious conglomerate who ordered the monster hunt. He can be found in the CREO Institute of Technology, the massive building found in Gideon’s Rock.
Before you head there, you need to get out of the cave first. Head to the next of Athena’s visions, which will reveal more details about her nature. Apparently, she can exercise some form of control over the Delver creature, instructing it to wreak havoc in the JCPD to free you and eventually lead you to her. You will also get a brand-new nanite weapon from the nanite chest, the Reaper’s Testament. From here, it’s only a matter of following a path which will lead you to a door near the river in Central Crossing.
If you head back to the Overlook, you’ll find that only Roach stayed behind. Hawke and Kill Switch are both gone, with no clues as to their whereabouts. The only thing left to do is head to the CIT building and meet Harold, the conglomerate’s personal robot assistant and meet with the man himself: Jonah Guttenberg, revealed to be the grandfather of Athena Guttenberg, and the original architect of the nanites and nanotechnology.
Stay tuned for more guides on The Surge 2. The game is now available for PC, PlayStation 4 and Xbox One. Check out my review for The Surge 2 here. You can also check out other The Surge 2 guides below:
- Beginner’s Guide
- Warden Garcia Boss Guide
- Best Starting Weapons and Armor
- URBN Gear Set and URBN Judgement Axe Location
- Little Johnny Boss Guide
- Brother Eli Boss Guide
- Exceptional combat mechanics.
- Well-implemented RPG system.
- Interesting level design, dense and filled with secrets and hidden routes.
- Good difficulty curve, extremely tough at times but completely fair.
- Improved storyline, with much more interesting characters.
- Fair bit of replay value.
- Great art, enemy and world design.
- Forgettable music.
- Some technical issues like animation jank and visual bugs.
- Constant backtracking may prove to be tedious to some people.


