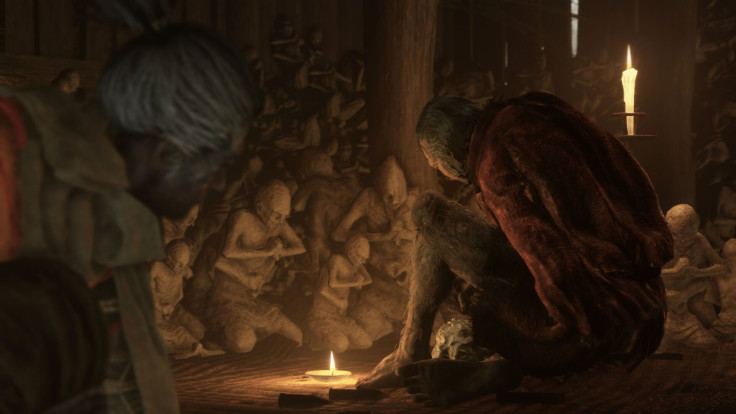
Sekiro: Shadows Die Twice has been kicking most of its playerbase’s butts for over a month now, and with some players picking it for the first time, the journey might be so unkind that they may choose to drop it altogether. Before you bow into submission and perhaps even spark a debate about the game’s “accessibility,” check out our guides, tips and tricks and perhaps you might find something useful – don’t give up just yet!
This guide covers some of the harder minibosses in the game, and shows how to deal with them in a way that you won’t kick and scream your face off. Some of them can even be cheesed – that is to say, exploited through various means – which is good news if you find yourselves on the brink of asking for a refund.
Chained Ogre
I saw a lot of people on various forums complain about this miniboss endlessly, whether about its borderline unfair hitboxes, or its merciless grab tracking, or just the fact that this ogre pretty beefy, especially at a stage this early in the game. However, most of these problems can be circumvented by taking note of these tips:
- Perilous grabs require precise dodges – If you’ve read my previous guide on general tips and tricks for the game, then you’ll know that the perilous grab is probably the most unforgiving one, especially in terms of both hitboxes and tracking. The reason for this is because Sekiro punishes the use of dodges; in stark contrast with Souls, dodges don’t have invincibility frames, and you will need to actually dodge away from the attack. This applies to the chained ogre, specifically. It has three grabs of varying speeds and tracking distance; for an actual safe strategy, dodge and run away as far from him as possible after the kanji appears.
- Red eyes = fire weakness – All enraged enemies (characterized by red eyes) are very susceptible to fire attacks, so it is actually very useful to have the Flame Vent prosthetic before the fight. This is entirely possible, as the old lady who gives the bell that is needed to go to the Hirata Estates is met very early in the game. It might be a good idea to take a trip there very early and rush towards getting the prosthetic, which is also found relatively early in the area.
- Grapple attacks are OP – One of the earliest skills you have access to is the grappling attack, which allows you to perform two blows in succession as you land after grappling. Every time the ogre does a perilous grab, you can grapple to him during a small window and quickly land two hits to his head. This is very useful for hit-and-run tactics, as you close the gap relatively easier by grappling to him instead of running. Protip: It’s also possible to survive being thrown off of the cliff if you grapple to him before you fall.
- Stealth Deathblow is entirely possible – There is a gachin sugar found very early in the game off of a cliff. Acquiring this will allow you to go into stealth and sneak up to the chained ogre without triggering his escape animation. Stand on the ogre’s right side and wait for the deathblow prompt to appear, and voila – just like that, the fight is cut in half.
Seven Ashina Spears – Shuikibu Toshikatsu Yamauchi
I’m not gonna lie – this was probably the hardest miniboss in the game for me. Yamauchi is a test of patience, endurance and skill, and it is worth noting that you should only fight him once you have a somewhat solid grasp of Mikiri counter (a helpful guide to that can be found here). Yamauchi fights with a huge and ridiculously long spear, and he can easily overwhelm you if you’re new to him. Luckily, once you have a hang on his move set and timings, you can easily beat him and take his prayer bead.
- Mikiri counter is your best friend – if you have not acquired the Mikiri counter at this stage in the game, you are already at a huge disadvantage. Enemies throwing perilous thrusts are only going to get more plentiful from here on out. Otherwise, just learn his perilous move set and go from there. It’s easier to be in his face all the time since you get to control the pace of the fight, and only let up once he starts charging his wide sweep attack.
- Distance is a disadvantage – Like most fights in Sekiro, fighting Yamauchi from a distance will always end up in his favor, doubly so because of his long spear attacks. Staying away from him will almost always result in him just attacking you from his considerable distance advantage. Learn to be aggressive and counter only within your sword range. A good range is one where you can easily hit him but still have enough distance so that you can time your Mikiri properly.
- Stealth deathblow – Since he is located in the same area as where you first rescue Kuro during the introductory part of the game, it is possible to retrace your steps and end up behind him, allowing you to stealth deathblow him and cut the fight in half.
- Cheese him with ledge attacks – if you find yourself hopelessly outmatched by Seven Ashina Spears, you can always lure him to the top of the stairs at the base of the tower, hang on a ledge there and do ledge attacks. He will not be able to reach you with any attack here, as well as breaking his AI in the process. Rinse and repeat, and you’ll end up beating him, albeit taking slightly longer.
O’Rin of the Water
This is another miniboss that is sure to get under your skin due to how incredibly fast she is. O’Rin is completely optional, yet you need to kill her if you want to get her prayer bead and possibly finish the samurai’s quest. O’Rin attacks fast and rarely relents, and if you attack her at the wrong moment, she phases through it and glides away. Hands down, one of the most annoying minibosses in the entire game.
- Stand still and focus on deflecting – One of the core aspects of this fight is how incredibly agile O’Rin is. Trying to match her agility in any way is not recommended, and thus it is actually more advisable to just stand still and focus on deflecting her attacks, while waiting for a window of your own. If you managed to time everything out perfectly, there’s no need for counterattacks as you can simply whittle down her posture until you can finally do a deathblow.
- Sabimaru is your best friend here – I am not entirely sure of the lore implications, but O’Rin is ridiculously weak to poison. Assuming you already have the Piercing Sabimaru, you can poison her and just run around until she dies, reapplying the poison as needed.
- Stealth deathblow – The first time you meet O’Rin, she will be playing her instrument and you can actually get some dialog from her. However, once the dialog ends, she will be hostile, no matter which answer you choose. You can, however, perform a stealth deathblow by hitting her from behind with a ceramic shard, or by simply jumping on her to displace her (jump once, not aerial kick). Assuming you did it right, a deathblow prompt will appear, and you can cut the fight in half.
- AI cheese – If you’re at your wit’s end and you simply can’t beat her conventionally, you can exploit O'Rin's AI by luring her to the Water Mill sculptor’s idol, then trapping her against a rock near the narrow pass. Once there, her AI will be stuck in a passive slow walk animation, allowing you to hit as you please. Remember to keep her stuck in a corner, because if she manages to slip away from it, she will snap out of the animation and she will be able to hit you again. This method is also possible at the other end of the wooden bridge, near the big rock.
Snake Eyes Shirahagi
The rifle wielders in this game are generally harder, but the two Snake Eyes mininbosses take the cake. Shirahagi is different as she is not optional and is required if you want to progress further in the game. Her gun and staff attacks do a lot of damage, and her timing can be pretty hazy, making her a general annoyance to duel against.
- Stealth deathblow – It is entirely possible to stealth deathblow her, despite the many gun-wielding enemies in the area. Starting from the Poison Pool sculptor’s idol, make your way up the cliff. Pop a gachin’s sugar, then grapple across the area, making sure to land on top of the fallen statue’s head, the one that’s askew. You’ll find yourself at her right side, and if you keep to the cliff face, you should be safe against any of the other enemies’ attacks.
- Exploiting her slow animations – You can permanently put her on a loop by throwing a firecracker then using the Double Ichimonji combat art. She will then most likely do her attacks, and once she finishes her combo rotation, rinse and repeat. The firecracker should hit before her own attack, and the stun from the combat art should be enough to put you back on the defensive before she does any of her moves. Rinse and repeat until she’s dead.
- Poison pool cheese – Although she is somewhat resistant to poison due to her being located in a noxious area, it is still possible to poison her. This tactic does require you to play the waiting game. Lure her into the poison pool and grapple up any cliff. She will be constantly aggroed, but will not leave the poison pool area. The poison will reapply itself as necessary, but you will still need to deathblow her after her vitality falls to zero.
If you liked what this guide has to offer, consider checking out our general tips and tricks to stay alive here. We've also compiled a list of the best upgrades for all the prosthetics in-game, which can be found here and here.


