

Did you update to iOS 9.3 and now your want to remove it and go back to iOS 9.2.1? You’re in luck. For a limited amount of time downgrading from iOS 9.3 to 9.2 is still possible.
On Monday, March 21, Apple released the latest iOS firmware -- 9.3 – but it has not yet closed the signing window on iOS 9.2.1. If you are someone who upgraded by accident or you are experiencing bug problems in iOS 9.3, you can still restore you device to the earlier firmware. There is never any indication of when the signing window will close though so you need to do the downgrade ASAP if you want to get back to iOS 9.2. Instructions for doing so follow.
How To Remove iOS 9.3 and Restore iOS 9.2.1 on Your iPhone, iPad or iPod
Step 1: Back Up All Your Data
One of the most important things to remember before every restoring or downgrading software is to make sure to save or backup all your important data. Any time you restore a device you are automatically setting it up to go to a kind of "factory settings" mode. This means any third party (non-stock) apps, contacts, emails, messages, music on your device currently will suddenly go bye-bye -- unless of course you back up your device first. ( Instructions for back-up are listed here).
Step 2: Download iOS 9.2.1 ISPW Or Restore
Once you've backed up your data, the next thing you need to do is download the proper ISPW. At this point, the only public firmware Apple is signing is iOS 9.2.1. This means, when you downgrade, you will be going down to iOS 9.2.1 There is no way to revert to earlier versions of iOS such iOS 9 or iOS 9.1. If you want to downgrade and revert back to iOS 9.2.1, then click here to select your device and find the ISPW you need. Once you locate the proper ISPW, download it and save it to your computer desktop. (Be sure to select the ISPW specific to your device.)
Step 3: Disable “Find My iPhone”
Once you’ve downloaded the proper ISPW, you need to disable the "Find My iPhone" function. This can be done by going to Settings->iCloud->Find My iPhone.
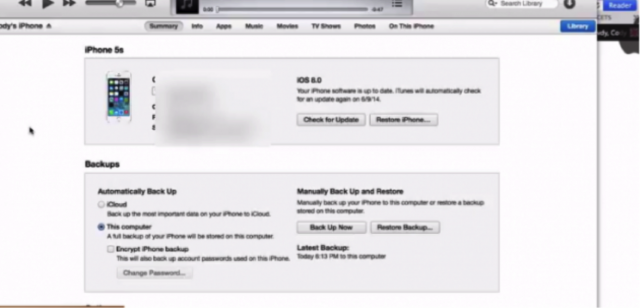
Step 4: Connect iPhone and Start iTunes
After downloading the appropriate firmware, the next step is to plug your iPhone into your computer and launch the iTunes program. Inside iTunes, you should see information pop up for your device. You will see the option to "Check for an update" or "Restore iPhone."
Mac Users:
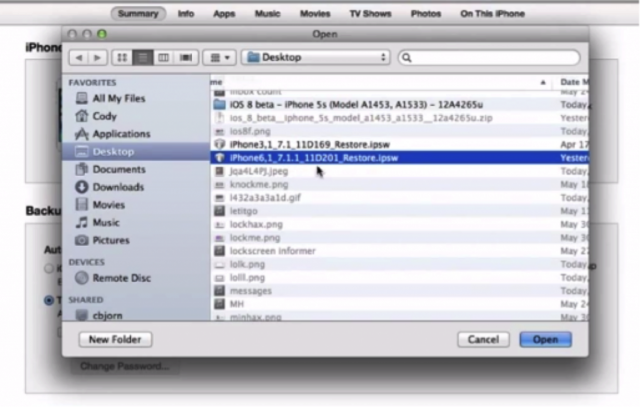
- While in iTunes, hold down the alt/option key and click on "Check for an Update"
- A window should pop up to search. Find where you saved the ISPW and open it.
- An update message should appear on the screen. Press "Update"
Windows Users:
- While in iTunes, hold down the SHIFT key and click on "Check for an Update"
- A window should pop up to search. Find where you saved the ISPW and open it.
- An update message should appear on the screen. Press "Update"
Once the software begins updating/downgrading DO NOT UNPLUG OR TURN OFF YOUR DEVICE. Your device will turn off and on again at one point and you will need to unlock your device with your passcode if you have one turned on. The device may show one last loading screen to finish the update and then you should be back to iOS 9.2.1
If you are having any trouble downgrading, check out the video posted below for additional help. It shows an example for downgrading from iOS 9.2 to 9.1, but the process is the same.


