

If you’re looking for solutions to Breath of the Wild’s Divine Beast Vah Medoh terminal puzzles, then you’re in the right spot. We have the solutions for all terminal puzzles in the Divine Beast Vah Medoh dungeon as well as tips, tricks and strategy for Medoh’s boss fight against Windblight Ganon. So if you’re ready to solve the Breath of the Wild Medoh terminal puzzles and defeat Windblight Ganon in the Divine Beast Vah Medoh dungeon, check out the Medoh walkthrough in our Legend of Zelda: Breath of the Wild guide below.
First of all, you’ll want to find the map terminal . After eliminating the glowing eyeball to your right when you enter the dungeon, you can catch the updraft and reach a wide ladder (where there’s a treasure chest). From there, glide to the corridor where you’ll find the map terminal. When you open it, you’ll notice the orange dots for terminals as well as three purple pins representing the intervals you can tilt Vah Medoh.
First Terminal: Catch the updraft on the opposite side of the big room. Once you hit the ceiling, glide to the large ladder, then climb up to the platform where you found a treasure chest. Eliminate the glowing eyeball and jump to the nearby doorway to enter the first room in the Divine Beast’s left wing.
You must fire an arrow at the glowing eyeball in the alcove to free the terminal of Malice Goo, then climb back up to the top of the ramp from which you entered. From there, open your map and tilt the Divine Beast so that its right wing rises (the top purple pin). Now the alcove should be lower than the ramp you’re standing on, letting you glide to the terminal. Activate it and drop down to the floor.
Second Terminal: After you get through the barred gate using a round bomb in the pipe to its right, hit the nearby crystal to create a sideways wind stream and drop another round bomb in the pipe. It will roll down to the wall and be propelled to the far corner. Detonate it to release a large metal boulder, then hit the crystal again and close the shutters.
Now tilt the Divine Beast, selecting the lowest pin. The boulder will move towards you. Grab the boulder through the transparent energy field using Magnesis and move it to the right, then drop the boulder close to the pipe. Then tilt the Divine Beast by its highest pin.The boulder will roll down and press the switch against the wall, raising the gate. This lets you examine the terminal in that room.
Third Terminal: Go back to the previous room and hit the crystal to reopen the shutters, then jump through the window opposite the first terminal. Glide to the platform below and get rid of the two glowing eyeballs: one is blocking an updraft in front of your landing point, while the other is by the nearby doorway. Then turn around and look towards the tip of Van Medoh’s left wing. The incline allows you to glide to that room, which contains the next terminal.
Fourth Terminal: Open the map and select the lowest pin of the Divine Beast, then glide back to the central room. Stay on the lower level and go through the central room. You will emerge beneath the right wing. Step up on the small ramp, then fire an arrow at the glowing eyeball attached to the right wing. Now you can glide to the room beyond. Walk up the ramp at the back to activate the terminal.
Fifth Terminal: Hit the crystal, which will open the shutters on the wall, producing a wind stream that activates two small windmills. One is fixed and the other slides back and forth, but will be in the correct position, thanks to the Divine Beast’s incline. With the two gates lifted, the battering ram will slide to the bottom of the room.
Now tilt the Divine Beast by selecting the highest pin. Just as the dungeon hits horizontal (before its incline shifts), cast Magnesis on the sliding windmill. As long as it’s kept in the wind stream, the gate will stay open, which will allow the battering ram to hit the pressure switch at full speed. This lifts the nearby barred gate and gives you access to the final terminal.
Main Control Unit: Tilt the dungeon back to neutral. Drop down in the central room. Ride the updraft all the way to the top, then activate the main control unit to trigger the boss battle.
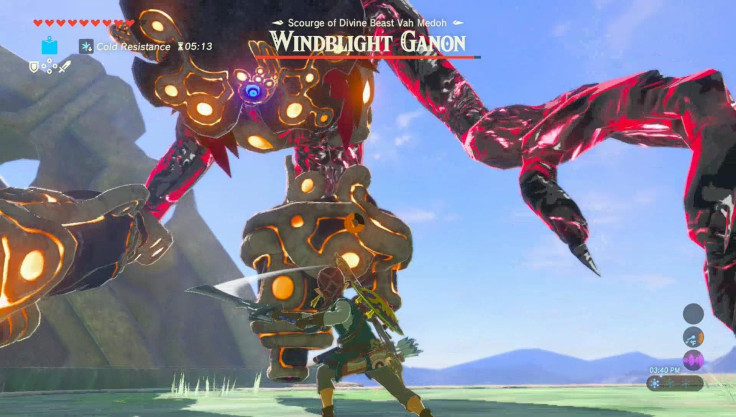
Windblight Ganon:
Phase One:
As long as Windblight Ganon has over half of its health remaining, it will use two types of attack.
The first attack will take place when Windblight Ganon stands at ground level. It will send a slow but unpredictable tornado in your direction that cannot be blocked. Just run away from this.
The second attack occurs when Windblight Ganon materializes higher in the air. It will fire energy blasts at you, which you should try to perfect-guard so that they inflict significant damage right back on Windblight Ganon. You’ll need excellent timing, so if you struggle, hide behind a solid object and wait till the attacks are over.
As far as offensive actions, you have two options at well. Option one: fire arrows at Windblight Ganon every time you have the chance. Standard arrows are fine. Make use of the many updrafts in the arena, as the slow-motion effect that is triggered when you aim while in the air will help you align neat shots at the boss's blue eye.
Option two: Sprint to Windblight Ganon when it appears at ground level. Use melee combos to inflict tons of damage very quickly, and stay out of range by standing right under or behind its body. While this is more risky, it’s a lot more efficient than the arrows.
Phase Two:
Once Windblight Ganon’s health dips below 50 percent, the battle gets a lot harder.
During phase two, WIndblight Ganon regularly summons four floating satellites that orbit it. You can destroy all four with arrows to force the boss to use its attacks from phase one, but they'll eventually reappear, so the best strategy is to focus on Windblight Ganon himself and not these floating distractions.
With the satellites up, Windblight Ganon will charge wind energy in a vortex and then send it your way as a quick-moving galestrike. This is very fast and can’t be blocked, so either sprint away or hide behind something solid like a pillar.
During phase two, the tornado attack gets upgraded into a double-tornado attack. Remember, they can’t be blocked, so run away as soon as they appear.
The energy blasts now bounce off the satellites, which makes their trajectory is unpredictable, and perfect-guarding them does nothing since they won’t hit Windblight Ganon’s body, so avoid, avoid, avoid.
As with its previous incarnations, Windblight Ganon will occasionally target you with a red laser and focus it until a powerful blue beam is released. If you perfect-guard this and reflect the beam, it will stun Windblight Ganon, letting you unleash mega damage in a full melee combo. But if your timing is off, your shield will be destroyed. When in doubt, sprint perpendicular to the beam to dodge it or hide behind something solid.
Your offensive options are the same as in phase one. The best (fastest and most effective) option is still to rush the monster and assault it with your most powerful combos and strongest weapons.
Once Windblight Ganon falls, grab the heart container and interact with the main control unit. You’ll receive Revali’s Gale, which lets you create an updraft by holding X. This helps you on long climbs or in some specific puzzles. A cooldown will of course be triggered once you use up all of this ability’s charges.
Do you have any more tips and tricks for solving the Vah Medoh terminal puzzles or defeating Windblight Ganon? Feel free to let us know in the comments section below. And before you leave, don’t forget to check out the following guides:
Review: Expansive World, Epic Story Makes This A Must-Own
Breath Of The Wild Amiibo: Here's Every Function For Every Figure
‘Breath Of The Wild’ Changed How I See The World
Six Gifts For 'Zelda' Fans Under $25
Nintendo Switch Scratched Screens Caused By Dock: How To Protect Your Console
Nintendo Switch Tips: Read This Before You Start A New Save
Beginner’s Guides:
Beginner’s Guide: Everything You Need To Know To Survive In Hyrule
Beginner Item Guide: Here's The Stuff You Shouldn't Sell
How To Start A Fire In 'Breath Of The Wild': Tips And Tricks For Keeping Link Warm
Recipe And Cooking Guide: Here's All The Ingredient Effects, Ranks And Tips You Need
Blood Moon Explained: Cooking Bonus, Enemy Respawns And More
Battle Guide: Tips On How To Take Down Your Enemies
Horse Guide: How To Tame And Ride Horses And Other Animals
Camera Guide: Tips To Use The Camera Like A Pro
Dungeon & Side Quest Guides:
Ruta Walkthrough: Solutions For All Five Terminals And Boss Hints, Too
Thunderblight Ganon Boss Battle: Tips And Strategy To Defeat Vah Naboris Dungeon
Ceremonial Trident: How To Complete 'Ceremonial Song' Sidequest And Unlock Dagah Keek Shrine
Hylian Homeowner Sidequest: Tips To Buy The House In Hateno Village
Weapons & Armor Guides:
Master Sword: Where To Find Link’s Greatest Weapon
Great Fairy Locations: Armor Upgrades And Where To Find Them
Armor Guide: Where To Find New Outfits, Clothes And Upgrades
Climbing Gear: How To Find The Armor, Bandana And Boots To Improve Climbing
Weapon Numbers Explained: Attack Power, Not Durability Listed In Inventory
Elemental Weapon Tips: Why Fire, Ice & Lightning Are Must-Haves For Your Arsenal
Collectible Guides:
Memory Map: All Locations For Link's Lost Memories
Korok Seed Locations: Where To Find Hestu And How To Solve Puzzles For All 900
Luminous Stone: What They're For, When You Need Them And Why You Shouldn't Sell Them
Heart Containers Guide: How And Where To Upgrade Your Health And Stamina
Easter Eggs And Secrets: 18 Things You'd Probably Miss If We Didn't Tell You
'Breath Of The Wild' Easter Egg: A Hidden Message Is Revealed From Game's Fantasy Sheikah Language
Glitches & Tricks Guides:
Unlimited Stamina Glitch: Find Out How To Run Fast Without Tiring [VIDEO]
'Breath Of The Wild' Rupee Trick: Get 700 Rupees Every 3 Minutes, Shares Redditor
Enemy Guides:
Ending Guide: How To Beat The Final Boss (No Spoilers)
Molduga Guide: How To Find And Defeat This Tremor Worm Before It Kills You
‘Breath Of The Wild’ Dragons: Locations And Their Purpose In The Game
Molduga Guide: How To Find And Defeat This Tremor Worm Before It Kills You
Stone Talus Guide: How To Beat This Enemy Sub-Boss And All Its Variants


