Remnant: From the Ashes has been out now for more than a week, and the general consensus for Gunfire Games’ attempt at a new IP – and an action role-playing one at that – has been very positively received. It’s not surprising, given that the game, despite some very obvious flaws, still manages to make itself an engaging and well-thought out shooter that took a lot of what’s good with its contemporaries and gave it a unique flair, all the while trimming the not-so palatable aspects.
The game also features a lot of exciting, yet pretty challenging, boss fights, and for this guide we’re taking a look at one of the key bosses before meeting with the mysterious Undying King. Claviger can be a pretty tough boss, especially on higher difficulties, but if you know your positioning well enough, then he becomes a very trivial (but still a little tedious) boss.
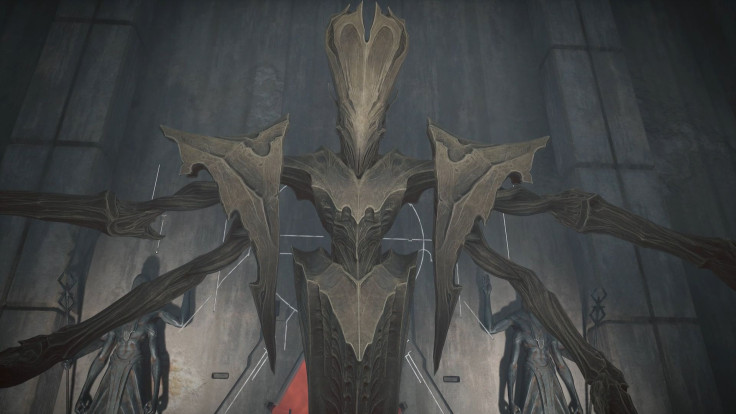
Meeting Claviger
Claviger is located in The Spindle in Rhom, the second world you encounter in Remnant: From the Ashes. Due to the nature of the game’s dynamic generation system, Claviger may not spawn for everyone; in some cases, The Harrow will spawn as the prerequisite boss before the Undying King himself. Should you find yourself facing Claviger, though, you’ll find that he can be a right challenging boss to face thanks to several of his abilities, all of which are designed to discourage you from outright attacking him continuously.
Claviger has four main skills, two of which are meant to attack you, one to defend him, and one to summon adds (minions) to his side. In addition to this, he also has a displacement move which lifts you high up into the air and rotates the platform you’re facing him on. Combine this with his decent-sized health pool and the dangers of falling thanks to the circular platform you’ll be fighting him on, and Claviger can be a very hard challenge indeed.
Dealing with the protective shield
It’s important to note that there’s no real pattern to how Claviger attacks, but you can safely assume that he’ll always start out with his protective shield. This shield envelops him, and you cannot damage him while it is up. Fortunately, you can deal with this easily by shooting the two orbs on either side of Claviger which, when destroyed, will pull down his shields and briefly stun him.
However, destroying those orbs isn't really that straightforward. While the shield is up, he’ll try and stop you with his projectiles, radiation ray, and summoned adds. Should he summon adds, remember to always deal with those first. The adds themselves can deal high amounts of damage thanks to their beam attacks, and as such you’ll want them dead as soon as possible.
Once the adds are dealt with, you can now focus on breaking the two orbs, which destroys his shield. Claviger will then be vulnerable for a few seconds, and he won’t be doing any attacks in that period. As such, this is the perfect time to unload all of your attacks. Below are some more tips on how to deal with Claviger before and after you down his shield.
- Remember to check your ammo before breaking the orbs entirely. You want to have a full clip on the weapon you will be damaging Claviger with once his shields are down in order to deal more damage to him.
- Claviger will usually throw projectiles in addition to summoning adds, and you can dodge those easily by either keeping your distance or listening to its audio cues. For the most part, you will be preoccupied with killing adds, but you don’t want to ignore Claviger’s projectiles entirely, either. If you can’t keep your eyes trained on him due to the adds, listen for audio cues on when he throws projectiles and dodge accordingly.
Displacement skill
Every time you bring Claviger down to a certain percentage of health, he will slam the platform to release a shockwave that will raise you up. Claviger will then rotate the platform to keep you away from the covering pillars. If there are adds that are alive, Claviger will consume them to gain back some of his health as well.
Once that’s done, you’ll hit the ground without taking any damage, and Claviger will reset his assault. There’s no way to avoid this skill, but its important to note that you should stop Claviger from consuming any adds during this phase if you want the Void Silver drop.
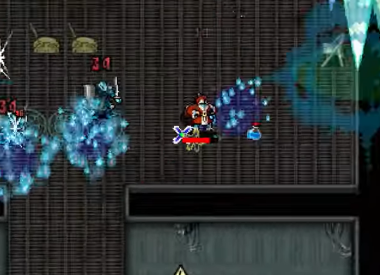
The annoying radiation rays
Besides projectiles, Claviger can summon a continuous beam of radiation energy which he will then use to decimate the platform. There are four pillars which you can hide behind, but they are easily destroyed by the beam itself. The rays are really annoying, and if they manage to hit you, you’ll get staggered pretty easily, which could potentially lead to your untimely demise.
While the most common thinking to avoid these beams is to just dodge out of the way whenever they’re near, there is a better and incredibly safer solution, one which also allows you to also damage Claviger. This method only works if there are no adds nearby, so make sure that you cleared the room before attempting this.
You can run up to Claviger and circle around his hovering hand, where the source of the beam is. It’s near the ledge where you can fall off, so be very careful when attempting this. However, if you pull this off, you’ll find that it’s a lot easier to dodge the beams since you can circle around his hand without the need to dodge entirely.
The beam kind of bugs out in this position, so you can take advantage of a few seconds before it reaches you to damage Claviger at close range. Try not to do melee attacks though, as the beam will most likely hit you if you overextend. With this method, you’ll find that not only did you not receive any damage (if done correctly), you also dealt some damage to him in return. That said, here are some more tips for effectively avoiding the radiation rays.
- If you’re doing my circling technique, the beam may not end up circling, but instead cross Claviger’s hands to meet you dead-on. Remember to always take note of where the beam is headed in order to not get singed by it.
- Since you’ll be close to Claviger in this position, it may be beneficial to use high-powered weapons like shotguns on him at this range.
Getting the Void Silver
There are many secrets in Remnant: From the Ashes, and a lot of them can be found through your interactions with bosses and how you choose to deal with them. Claviger is no exception, and depending on how your fight with him went you’ll be treated to two unique drops: Stone of the Guardian or Void Silver.
- Stone of the Guardian drops if Claviger managed to consume at least one add during his displacement skill. This can then be crafted into the World Breaker boss weapon, a slow yet devastating melee weapon that deals a small amount AoE damage around its intended target.
- Void Silver drops if Claviger does not consume any adds in the duration of the fight. The Void Silver can then be used to craft the Particle Accelerator, a powerful long-range rifle with a built-in Gravity Core mod.
If it’s not obvious yet, the Void Silver is arguably the better drop of the two, and as such you need to focus on killing the adds before Claviger can consume them. It’s pretty easy to do if you’ve been following this guide to a T, and once you’re done, you’re rewarded with a really powerful weapon.
More tips and tricks to remember
- Claviger’s projectiles are slow, and strafing from them can work if you know where they’re coming from. Just be sure that there are no adds nearby or in the way.
- Always prioritize adds before everything else. Weirdly enough, Claviger’s fight is easier if you prioritize on damaging him last, since most of his power comes from the summons and his radiation rays.
- If you were lucky enough to face Singe back on Earth before the Labyrinth, then you’d have crafted the Spitfire weapon already. The Spitfire’s special flame attack is great for taking down Claviger at close range, since burning damage seems to do a lot of damage to him. It’s also a decent way to conserve ammo, since the flame attack doesn’t use regular ammo.
Stay tuned for more tips, tricks and guides to Remnant: From the Ashes.