The biggest part of Super Mario Odyssey are the Power Moons, you’ll need a certain number in each Kingdom to power up your ship and progress the story.
For the completionists out there, you’ll want to collect every Power Moon in every Kingdom but it can be a bit tricky. Most of the Power Moons in each Kingdom won’t be accessible until after you complete the story.
There are also little tricks to solving puzzles, completing tasks for others and much more and we got you covered. You can also use Uncle amiibo to use your amiibo figures to find Power Moons for you.
Since there are so many Power Moons in Super Mario Odyssey, we’re breaking down each Kingdom in separate stories starting with the Cap Kingdom.
To find the Power Moon locations for the other levels in Super Mario Odyssey, check out our other Kingdom Guides:
- Cap Kingdom Power Moon Locations
- Sand Kingdom Power Moon Locations
- Wooded Kingdom Power Moon Locations
- Lake Kingdom Power Moon Locations
- Cascade Kingdom Power Moon Locations
- Cloud Kingdom Power Moon Locations
- Lost Kingdom Power Moon Locations
- Moon Kingdom Power Moon Locations
- Metro Kingdom Power Moon Locations
- Seaside Kingdom Power Moon Locations
- Luncheon Kingdom Power Moon Locations
- Bowser’s Kingdom Power Moon Locations
- Ruined Kingdom Power Moon Locations
- Snow Kingdom Power Moon Locations
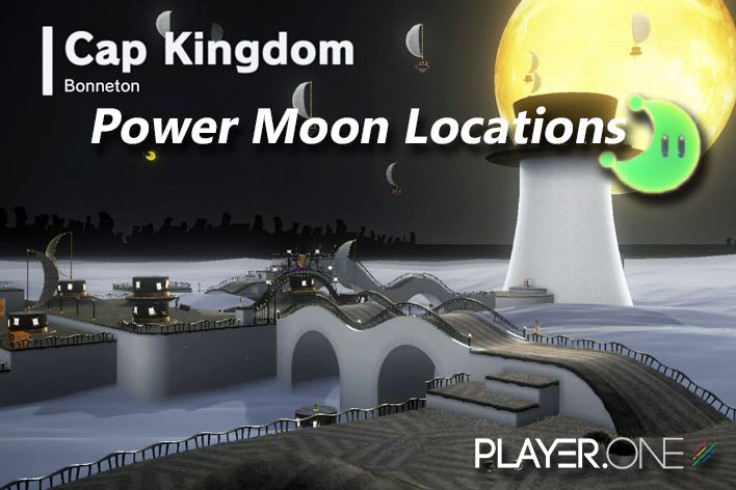
The Cap Kingdom is the first area you visit and is Cappy’s homeworld. However, you’ll get most of these Power Moons after completing the story and returning.
So there may be some minor spoilers so be aware.
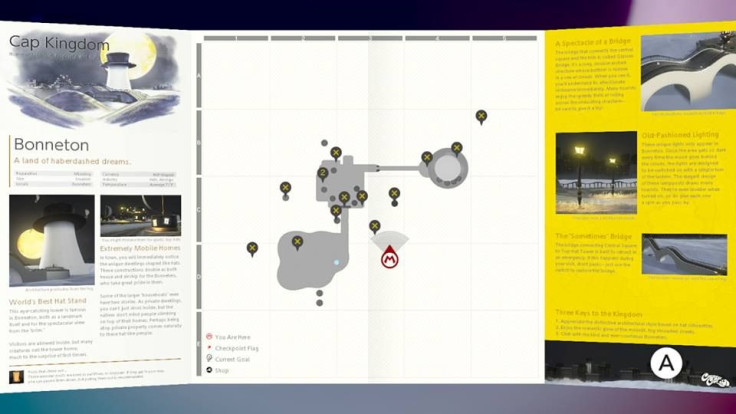
Power Moon #1 - Frog-Jumping Above the Fog
Capture a frog and leap over the railing just east of the Odyssey. Look for a top hat in the mist and hop up onto it. From here, hop onto the second top hat. There’s an invisible block hidden in the mist above three blocks you can break. Jump up to it and jump straight up to grab the Power Moon.
Power Moon #2 -
Near Central Plaza, capture a frog look for a Power Moon hovering over a top hat. Shake your controller to perform a high jump and grab the Power Moon.
Power Moon #3 -
Completing the Timer Challenge. Find the scarecrow in the bottom of the Sometimes Bridge and activate it. Dash and make your way to the end to earn the Power Moon. Use Mario’s roll ability and shake the controller to make him faster.
Power Moon #4
Find Captain Toad atop Top-Hat Tower. Captain Toad appears in every Kingdom and he gives a Power Moon when you find him.
Power Moon #5 - Shopping in Bonneton
Head to Central Plaza and speak to the yellow Crazy Cap merchant. Buy the Power Moon for 100 coins. There’s a Power Moon for sale in each Kingdom.
Power Moon #6 - Skimming the Poison Tide
Go to the top of Top-Hat Tower’s northern side and leap, landing on a ledge halfway up the tower. Look for a red door and go inside. Capture the Paragoomba to fly through the four rings above the poison. The four coins will give you four Power Moon fragments. The fifth fragment is found near the white platform.
Power Moon #7
In the same area as Power Moon 6, make your way across the poison to the far white ledge. Use Paragoomba’s power to pass over the wave of poison. Make your way to the platforms, which will lead to a Power Moon.
Power Moon #8
On Top-Hat Tower, look for a red door near sliding platforms. There will be platforms and Spark Pylons that you’ll need to navigate but if you do, a Power Moon is your reward.
Power Moon #9
In the same area as #8, head to the upper level of the push-blocks and then reach an organ platform. Wait for the block to extend outwards and grab the Power Moon that appears.
Power Moon #10 - Searching the Frog Pond
Drop down the ledge in the northwest corner of Central Plaza and look for a door. You should be able to head inside and find five Power Moon fragments scattered. Collect them and grab your Power Moon.
Power Moon #11 -
From #10, enter Frog Pond and capture a frog to jump to a white platform nearby. Leap onto a narrow wall where a small recess on the wall above is and a Power Moon.
Power Moon #12 -
Approach the Bonneter from the home on the east of Central Plaza where they’ll you a tale of a treasure. First, go to the Crazy Cap store where there’s a pile of crates. Next, run through a small strip of fog beneath the homes of Central Plaza. Keep running across the Glasses Bridge and head to the large hill near the Odyssey. Once on the hill, feel the vibrations in your controller and ground pound where the vibrations are strongest.
Power Moon #13 - Taxi Flying Through Bonneton
Capture the Binoculars in Central Plaza and look up to the moon. Scan the fleet of airships and look for the one that looks different and zoom in. The ship is actually a taxi and spotting this will reward you with a Power Moon.
Power Moon #14 - Bonneter Blockade
Return to Central Plaza and speak with the Bonneter in the southeastern house. After speaking with him, capture a Paragoomba and enter the house to scare him. Once he leaves, go inside and grab the Power Moon.
Power Moon #15 -
Win the Cap Kingdom Regular race against the Koopa that is found atop the Top-Hat Tower.
Power Moon #16 - Peach in the Cap Kingdom
After defeating Bowser, return to Central Plaza and look for four flowers growing on the overlook. Princess Peach will be there, speak to her to grab a Power Moon.
Power Moon #17 -
Find the Hint Art on the side of Sometimes Bridge and after restoring the town. Take a picture of it and study the pattern. Take the Odyssey to the Moon Kingdom and approach eight characters all standing in a row. Stand behind them and ground pound behind the second character from the left.
To gain access to Power Moons 18-31, you’ll need to return after defeating Bowser and smashing the moon rock that is located to the east of the first bridge. It will show where the rest of the Power Moons are.
Power Moon #18 -
Found atop the hat next to Glasses Bridge. Jump down and grab the Power Moon.
Power Moon #19 - Danger Sign
Capture a Paragoomba and go south of the Odyssey towards a danger sign. The Power Moon is on top of the sign.
Power Moon #20 -
Warp to the top of Top-Hat Tower and climb over the railing above Sometimes Bridge. There’s a Power Moon underneath the hat’s brim, so dangle over the edge and make sure you’re right over the Power Moon. Drop off and grab it on the way down.
Power Moon #21 -
Capture a Paragoomba and leap off the Top-Hat Tower to find a ledge behind the northern side of the tower. Fly out over the fog and keep flying until you see the Power Moon in the distance.
Power Moon #22 -
Throw Cappy at the large hat emblem atop the Glasses Bridge, this will spin the hat embl. Spin it well enough to produce the Power Moon.
Power Moon #23 -
Capture a Paragoomba and fly north of the hat with the Moon Rock on it. Throw Cappy at the glowing spindle atop the hat. Throw and hold to produce the Power Moon.
Power Moon #24 -
Find the glowing spot on the lowest platform on the north side of Central Plaza. Ground pound to get the Power Moon hidden in the fog.
Power Moon #25 -
Capture a Paragoomba and find a bird and intercept it. This bird is constantly moving so it may take some time to find it.
Power Moon #26 -
Near the Odyssey a rabbit will appear, use Cappy to hit it and slow it down until you catch it.
Power Moon #27 -
Capture a Paragoomba and head west of Central Plaza to where a glowing treble clef is. Capture the notes as they appear before the time runs out.
Power Moon #28 -
Toss Cappy at the scarecrow to start the timer challenge and complete before time expires.
Power Moon #29 -
HEad to the top of Top-Hat Tower and take on the Koopa in the Master cup race. Beat him to get another Power Moon from it.
Power Moon #30 -
Head down the square warp pipe in Central Plaza to enter a special challenge level. Move towards the edge of the hill and start rolling, collecting coins. Once you reach the end, you’ll be gifted a Power Moon.
Power Moon #31 -
In the same square warp pipe as #30, enter the level and instead of taking the main path stay to the left near the start. There will be a narrow pathway that will lead you to a Power Moon.
To find the Power Moon locations for the other levels in Super Mario Odyssey, check out our other Kingdom Guides:
- Visually pleasing
- Great Story
- Controls are amazing and uses Switch motion controls the best
- Great new characters and environments
- Could be more difficult
- Camera angles can get annoying