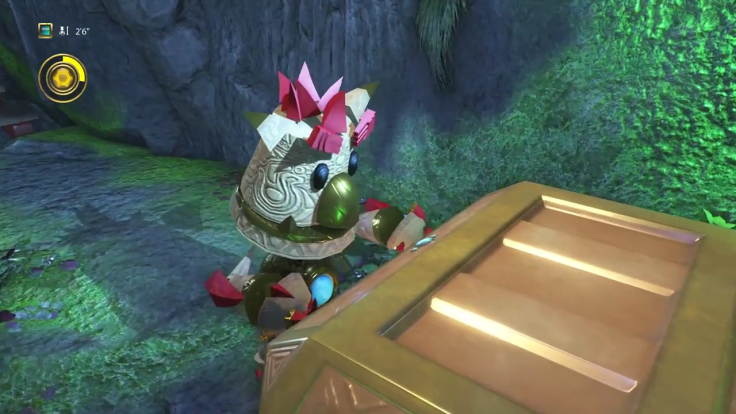
Knack 2 is full of buried treasure to upgrade your protagonist with any number of cool abilities. If you’re hunting for that last necessary part for a cool transformation, here’s where you should look. Note that some of these areas may be blocked off on easier difficulty settings.
We've also embedded a helpful video from PowerPyx For those who need a little more context.
Chapter 1 Treasure Locations
- 1-1: You’ll come to a point where you’ve just surfaced from a vent and there’s a large staircase headed upward. Straight ahead from the bottom of those stairs is a crawlspace for small Knack to climb through.
- 1-1: In the garage area there’s a large downward slope and a burning car. Remove the car to find a crawlspace.
- 1-1: There’s a wood beam platforming section. Kill the enemies in the area and then transform to small Knack to the right of the first beam.
Chapter 2 Treasure Locations
- 2-1: In the section with three see-saw planks, there’s a large window on the left by the third plank.
- 2-1: There’s an area where you fight two goblins on the back end of the house. By the boarded windows you’ll see a notch small Knack can climb through.
- 2-2: When you see your first glowing crate, just shove it to the left and squeeze small Knack through.
- 2-2: There’s an area where you teleport near some rocks. Break them to reveal a crate. Move it to the right, hop on top, then inside the small Knack space.
- 2-3: Once you’ve reached the central map, head left and you’ll see a series of weighted pillars. To the left is a ledge that small Knack can walk on. Keep following it to reach another crawlspace.
- 2-3: There’s a series of stair-like ledges that small Knack can climb up. Do so and follow the ledge to the right to find another space.
- 2-4: Break rocks to the right in the area where you encounter a big swarm of bad guys. It will open up a teleporter that takes you to a tunnel.
- 2-4: After a platforming puzzle, follow the path to the ledge below to fight through more bad guys. Turn left, break the crates and you’ll come to a simple platforming section. Jump through it to reach a crawlspace.
Chapter 3 Treasure Locations
- 3-1: Once you’ve made it past the giant rolling balls, go through the opening at the top on the left. The right is obscured by another ball. At the end of the hall is a chest.
- 3:1: The camera angle will shift and you’ll hear a man yell at you. Just prior to his location is a ledge area that small Knack can climb to. Follow it along, dodge the poles and you’ll reach a window. Inside is a treasure chest.
- 3-2: Stay left when entering the mines. Pass the relics and enter a room with some enemies. On the back wall of the room is a glowing sunstone. Jump to it and get it. Head down the hallway for more treasure.
- 3-2: After riding an elevator, take metal Knack and stand on the pressure plate on the right. A relic energy chest blocks the next treasure entry.
- 3-2: After a platforming puzzle where you swing across some chains, stand on the pressure plate ahead and leave your metal statue there. This opens a room with a moveable crate. Take it to the bottom right of the screen and hop in the notch.
- 3-3: Just after getting your first glimpse at ice Knack, you’ll see a bridge ahead. Before crossing, jump up and to the left to find a ledge that leads to a treasure chest.
- 3-3: Before exiting the mines, you’ll find a hole to the right of the pillars that contain the final door switch.
- 3-4: You’ll encounter a puzzle with falling platforms. Once that’s over, you’ll be dropped near a notch that small Knack can climb through.
- 3:4: After more falling platforms, you’ll see a tiny ledge with a notch that small Knack can squeeze it through.
Chapter 4 Treasure Locations
- 4-1: Once you’ve dismantled the water tower, you can use the top of it to jump to some treasure.
- 4-1: You’ll come across a puzzle where you can use a geared elevator to raise a crate. Use the crate to jump to a ledge with a hole for small Knack.
- 4-2: Ahead of the first gear set in this subchapter, you’ll see a sunstone. Grab it and take the treasure that waits ahead.
- 4-2: After some long mechanical platforming, you’ll be tempted to end the section by hopping down. Go to the pillar with the sunstone, break the stone and climb through the space ahead.
- 4-2: On the winding path when you first come outside, there’s a path to the left that small Knack can climb on. Follow it to reach some treasure.
- 4-3: After beating up some robots, you’ll see a box in the lower left of the screen. Jump on top of it to reach a small treasure notch.
- 4-3: You’ll have a big fight with a super sunstone, and some metal bits wait ahead. Grab them and head back to the right and drop the metal onto the weighted switch. It will open a space near a wall with a lamp and some glyphs.
- 4-4: Go left at the start of the level until you reach a huge laser cage blocking a small area. Use small Knack to get through, break the boxes and climb through the hole.
- 4-4: Once you’ve turned off the power, jump up to find a red switch that opens up a hallway with a small vertical beam grate at the end. Right next to it is a treasure spot.
Chapter 5 Treasure Locations
- 5-1: Before jumping down to kill a turret goblin, hop up the gray ledges to reveal a treasure space.
- 5-1: Once you jump down from the previous location, go to the bottom right of the screen to walk along a path with a hook at the end. Pull it and you’ll reveal a small hall with a treasure area.
- 5-2: There’s a fountain at the start of the level. Enter the hole inside it to find some treasure.
- 5-2: Ryder questions why the goblins are attacking, and you’ll come across a big hookshot section. Before getting to the top, jump to the left ledge with a sunstone. Follow the path to get the treasure.
- 5-3: Disable the lasers and bring the crate on the left side of the room to the right. From the stairs, jump on the crate to reveal a treasure notch.
- 5-3: You’ll fight three robots. Hit the switch and head to the left to backtrack to the start of the level. On the right is a previously blocked room with some beams. Use stealth Knack to walk through them, break the boxes of relic energy and hop through the space on the right.
- 5-4: In the second shaft that small Knack can climb through, push him to the right once inside. He’ll walk through an obscured hall with treasure at the end.
- 5-4: In the right of the courtyard are some boxes and sunstone. Break them to reveal a treasure space.
Chapter 6 Treasure Locations
- 6-1: Once you exit the cave, you’ll find a large gap you can jump across. Do so and find a small hole straight ahead.
- 6-1: Move the crate all the way back to the invisible wall near some rubble. Jump up and you’ll see a small treasure notch wedged in the rocks.
- 6-2: After jumping down to the street, shift the nearby crate so it reaches the very visible treasure notch on the right.
- 6-2: In the square where you fight two boomerang foes, you’ll find a market cart near a furnace-looking thing. Break it to reveal a treasure hole.
- 6-2: The goblins will shut the doors and that’s your cue to go to the next area. After a small jump, you’ll see a path lined with sunstones. Follow it and at the end is some treasure.
- 6-3: Once you board the second platform in a series of platforms, kill the enemies and head left. Amidst the platforms is an area with three large pipes on the wall that shoot steam. Just before the third pipe is a hole for small Knack to fit through.
- 6-3: You’ll come across a series of big weighted boxes. Let the one furthest to the left fall down enough so that you can access a small ledge below. Use small Knack to get there and head through the hole in the wall.
- 6-4: Carefully work your way to the rightmost path of the tunnel stealth section. If any soldiers see you, you’re dead. If you’re successful, you’ll make your way to a treasure area.
- 6-4: In the section where you have to drag a platform with stairs on it, push the second one all the way to the right to access the very visible hole in the wall.
Chapter 7 Treasure Locations
- 7-1: When you reach the portion with several spinning gears, drop down instead of hopping over them. To the left is a treasure area.
- 7-1: There’s a huge section of platforming with raising and falling pillars as well as spinning blades. Near the very last group of spinning blades is a notch. Look for the two green crystals that emphasize its location and jump left.
- 7-1: You’ll come across a platforming section that ends with a torch blowing out of round holes attached to a wall. Once you're past them, squeeze right through the fencing as small Knack. To the right of the big box is a treasure area.
- 7-2: In the area where a worker reminds you about using scrap metal, take the dropped box and pull it all the way over to the second pillar on the right. Jump up and straight ahead is a chest.
- 7-2: When you see Ryder standing atop a pillar staring at some wooden boxes, jump down and head to your immediate left to find a small notch.
- 7-3: After you defeat your first tank, hop out of the vehicle and enter the small passage on the left to find a treasure nook. It’s marked with sunstones.
- 7-3: You’ll come to an area where you open a big gate and a robot waits on the other side. Head to the left where the fence meets rubble. Hop out and jump on the pillar that has workers on it to the left. Behind one of the workers is a small notch to the left.
- 7-4: Once you pass through the big Titan body, head right and break the boxes nearby. It opens up a pipe with treasure inside.
- 7-4: After the stealth part keep moving forward till you see a suspiciously placed sunstone. It marks a treasure area.
Chapter 8 Treasure Locations
- 8-1: After killing some spiders at the spawn, head left and look for some ledges by the grouping of crystals on the rock. Transform and follow them to the right to reveal a treasure area.
- 8:1: You’ll come to an area where there are two groups of flat, flipping pillars. Just before jumping to the second one, jump left and you’ll see a small notch in the wall that has treasure.
- 8-1: At the big wall puzzle, hit some switches so tiny Knack can make his way to the wall’s left side. Jump to the ledge beside the wall and the treasure area is straight ahead.
- 8-2: On the left side of the next wall puzzle is essentially the same chance for treasure.
- 8-2: In the puzzle area with the two colored boxes and markings on the floor, move each box to its corresponding color to open a pathway to the right. Jump up to the room and through the notch on the left side of the wall. Pass through the barricades and throw a boomerang to reveal spinning platforms. Jump and follow them to the left to find a treasure notch.
- 8-3: Around the first turn you’ll see a robot stuck in a crack. Kill it, use small Knack to scoot under and grab the treasure ahead.
- 8-3: Scale the left of the big wall and keep going as you turn a corner. Pass the first big hole and look for a small one beside it. That’s where the treasure is.
Chapter 9 Treasure Locations
- 9-1: In the parking lot with the turret, there’s a hole in the wall to the right. Transform into small Knack and grab the treasure.
- 9-1: Lucas lands his plane and you’ll be plopped in a courtyard with statues. There’s a small entrance under one of them that’s partially obscured by leaves. You’ll have to break a box to see it.
- 9-2: Look for a fireplace with a rug near the foot of the stairs. There’s treasure inside the fireplace.
- 9-2: Break through the grate and you'll enter a library. Maneuver the bookcases to work up the righthand platform marked by sunstones.
- 9-2: When you reach the area of the lab with two traps and a smooshing platform, get to the area by the guard where you’re forced to shrink down. While small, push right and you’ll walk into a hidden treasure path.
Chapter 10 Treasure Locations
- 10-1: In the first smaller area (where you have to push a small pillar to avoid detection from spotlights) push the pillar to the wall. Instead of jumping up, pass through the small notch on the right.
- 10-1: In the large garden area, use the pillar to move all the way left to a treasure chest marked by sunstones.
- 10-2: In the first group of Katrina’s two hovering robots, grab one as small Knack and fly to the left. You’ll see a blue ledge that follows to a treasure notch on the left.
- 10-2: Once you’ve become stealth Knack, backtrack to the previous room and head through the center laser wall to find a stash of goodies. Break the relic boxes on the left to reveal a treasure nook.
- 10-2: There’s a very visible nook to the right of the elevator.
Chapter 11 Treasure Locations
- 11-1: Push the minecart up the ramp and you’ll see a ton of ledges on the right wall by its holder. Place the cart there and jump up.
- 11-1: Just after getting off the ground-floor elevator, break some boxes by the brick wall to the right to reveal a treasure area.
- 11-2: In the room with the first group of enemies, there’s a ground-floor treasure area hidden off to the right before you jump up.
- 11-2: After defeating the big spider, go left and left again instead of heading up the elevator. You’ll find a hallway that leads to treasure. It’s marked by crystals.
- 11-3: In the first room of enemies there’s a nook in the right-end area. Don’t go up the stairs or you’ll miss it. You may need to break some stuff, but it’s right where the staircase meets the adjacent wall.
- 11-3: You’ll need to collect lots of relics to open a huge door, but don’t do it just yet. You’ll find a nearby room with a group of regular boxes to the left. Climb these and then climb the rafters till you reach the crystal-marked nook on the left.
- 11-3: Scale the tiny ledges with the pipes and destroy the nearby relic chest that waits above. A treasure nook hides behind it.
Chapter 12 Treasure Locations
- 12-1: Ride the spinning column down, there’s a nook at the bottom to the right.
- 12-1: In the room with the disappearing bridges, there’s a hole in the wall where the second bridge ends.
- 12-2: After you push off the super robot, jump down and you’ll reach an area with some relic boxes and a sunstone. Walk towards the bottom of the screen and you’ll wrap around a path that heads straight to some treasure.
- 12-2: After crossing through the large, propeller-like spinning platform, take an immediate right at the orange box. The box conceals a space.
- 12:-2 When you come to the platforming area with the large propellers folding down, make your way across and onto the small ledges. When the path forks, go left. You’ll find a hallway leading to treasure.
- 12-3: Whack the large boulder to destroy the robots on the hill below. There’s treasure in the hole left by the boulder.
- 12-3: After defeating the shielded robot by the electric wall, pass through the open barrier and drop down. Wrapping around to the rocks on the left is a small treasure nook.
Chapter 13 Treasure Locations
- 13-1: After fighting Xander’s first creation, there’s an opening concealed by some boxes beside the group of trees near the fence.
- 13-1: At the end of the long ramp, the map opens up to an area with a small island of trees and some garages to the left. Go into the open garage that’s furthest left and a treasure chest awaits.
- Chests for 13-2 are the same as 1-1 and there are no chests in 13-3.
- 13-4: When in the streets, jump to the wood plank structure to your right. Hit some boxes there and you’ll find a nook filled with treasure.
- 13-4: Just after you defeat the giant, walk ahead and you'll see a large truck and a barricade. Jump on the truck, go left and find the treasure area marked by sunstone.
Chapter 14 Treasure Locations
- 14-1: Push the minecart all the way to the left and jump onto it to find a treasure nook.
- 14-1: When you see your first Knack clone, hang a left. Transform to small Knack to keep walking along that ledge and you’ll come to a Treasure chest.
- 14-2: Freeze the side-by-side spinning spikes and head to the path to the right to find a chest.
- 14-2: When you reach the area where you walk up a small flight of stairs that leads to some platforming ledges, ignore them for a second and break the boxes around the corner. There’s a treasure nook behind them.
- 14-2: Towards the end of the long stretch of monorail platforms, you’ll see the wall jut out and lead toward a small window that contains a treasure chest.
Chapter 15 Treasure Locations
- 15-1: Follow the long outdoor hallway until you reach a treasure nook.
- 15-1: While Xander babbles on about his plan, follow the path and drop down as the level dictates. To your immediate right you’ll find a small window with a treasure chest.
- 15-2: When you come to the groups of two platforms that go up and down, you’ll notice that the first pair hides a nook when the second platform recedes.
- 15-2: When you reach the large rolling canister, transform into small Knack to go under it as it rotates. It’ll leave you off at a treasure area marked with a sunstone.
- 15-2: When you come to the part where robots toss projectiles at you from a distant platform, ignore the stairs and keep going straight. A door will open to an area that has a nook with a treasure chest.
That’s every piece of treasure in Knack 2! Enjoy those trophies and sweet upgrades!
Knack 2 is available now on PS4. Read our full review.
Did treasure hunting make Knack 2 entertaining? Were you able to find them all? Tell us in the comments section!
- More varied gameplay in levels
- Couch co-op is always appreciated
- Combat is smartly expanded
- Platforming can be frustrating
- Puzzles are uninspired
- Cliche story

